Quick Start
This document is a quick start guide in how to use the legacy 0.1.2 OpenEM package. The instructions in this guide still work for newer versions, but usage of the python inference library is encouraged.
Example data
This tutorial requires the OpenEM example data which can be downloaded via BitTorrent here.
Installation
OpenEM is distributed as a native Windows library or as a Docker image. See below for your selected option.
Warning: The windows binary releases have been deprecated as of
version 0.1.3.

Refer to the python deployment library.
Windows
- Download the library from our releases page.
- Follow the instructions to set up a Python environment.
- Open an Anaconda command prompt.
- Navigate to where you downloaded OpenEM.
Docker
- Make sure you have installed nvidia-docker 2 as described here.
- Pull the docker image from Docker Hub:
docker pull cvisionai/openem:latest
- Start a bash session in the image with the volume containing the example data mounted. The default train.ini file assumes a directory structure as follows:
working-dir
|- openem_example_data
|- openem_work
|- openem_model
The openem_work and openem_model directories may be empty, and openem_example_data is the example data downloaded at the beginning of this tutorial. The following command will start the bash shell within the container with working-dir mounted to /data. The openem library is located at /openem.
nvidia-docker run --name openem --rm -ti -v <Path to working-dir>:/data cvisionai/openem bash
If using any X11 code, it is important to also enable X11 connections within the docker image:
nvidia-docker run --name openem --rm -ti -v <Path to working-dir>:/data -v"$HOME/.Xauthority:/root/.Xauthority:rw" --env=DISPLAY --net=host cvisionai/openem bash
Note: Instead of $HOME/.Xauthority one should use the authority file listed from executing: xauth info
Launching additional shell into a running container
If the container was launched with --name openem, then the following command
launches another bash process in the running container:
docker exec --env=DISPLAY -it openem bash
Substitute openem for what ever you named your container. If you didn’t name
your container, then you need to find your running container via docker ps
and use:
docker exec --env=DISPLAY -it <hash_of_container> bash
Running the deployment library demo (0.1.2 and earlier)
- Navigate to examples/deploy/python.
- Type:
python video.py -h
- This will show you the command line arguments to process a series of videos end to end. The command will look something like:
python video.py \
    <path to openem_example_data>/find_ruler/find_ruler.pb \
    <path to openem_example_data>/detect/detect.pb \
    <path to openem_example_data>/classify/classify.pb \
    <path to openem_example_data>/count/count.pb \
    <path to video 1> <path to video 2> <path to video 3>
- The output will be a csv file with the same base name and location as each video.
Running with Docker
- If you do not want to enter a docker bash shell and instead want to process a video directly, you can use the following command:
nvidia-docker run --rm -ti -v \
    <path to openem_example_data>/deploy:/openem_models \
    -e find_ruler_model=/openem_models/find_ruler/find_ruler.pb \
    -e detect_model=/openem_models/detect/detect.pb \
    -e classify_model=/openem_models/classify/classify.pb \
    -e count_model=/openem_models/count/count.pb \
    -e video_paths="<path to video 1> <path to video 2> <path to video 3>" \
    -e CUDA_VISIBLE_DEVICES=0 cvisionai/openem
Deployment library (0.1.2 and earlier)
Navigate to examples/deploy. This directory contains the examples for the main library in the cc directory, plus python and csharp if you built the bindings to the main library. Source files for these examples are located here for your inspection. In addition, there is a script that will run all of the examples for you if you point it to the location of the example data. This script is called run_all.py.
Now invoke the run_all.py script to see how to run it:
python run_all.py -h
This will show you the command line options for this script, and give you an explanation of each of the available examples to run. The simplest way to invoke the script is as follows:
python run_all.py <path to OpenEM example data>
Doing so will run all available examples in all languages for which you built the software.
Once you are able to run the examples, you are encouraged to inspect the source code for the language that you plan to use for your application.
Training library
To train a model from the example data you will need to modify the configuration file included with the distribution at train/train.ini. This file is included as an example so you will need to modify some paths in it to get it working. Start by making a copy of this file and modify the paths section as follows:
[Paths]
# Path to directory that contains training data.
TrainDir=<Path to OpenEM example data>/train
# Path to directory for storing intermediate outputs.
WorkDir=<Path where you want to store working files>
# Path to directory for storing final model outputs.
ModelDir=<Path where you want to store models>
# Path to directory that contains test data.
TestDir=<Path to OpenEM example data>/test
Extracting imagery
TrainDir is the path to the example training data. WorkDir is where temporary files are stored during training. ModelDir contains model outputs that can be used directly by the deployment library. Once you have modified your copy of train.ini to use the right paths on your system, you can do the following:
python train.py train.ini extract_images
Where train.ini is your modified copy. This command will go through the videos and annotations and start dumping images into the working directory. It will take a few hours to complete. Images are dumped in:
<WorkDir>/train_imgs
Ruler Training
Next, you can do some training. To train the find ruler model you can do the following command:
python train.py train.ini find_ruler_train
This will start training the find ruler model. This will take a while. If you want to monitor the training outside of the command line, you can use Tensorboard. This is a program that serves a webpage for monitoring losses during training runs. Use the following command:
tensorboard --logdir <path to WorkDir>/tensorboard --port 10000
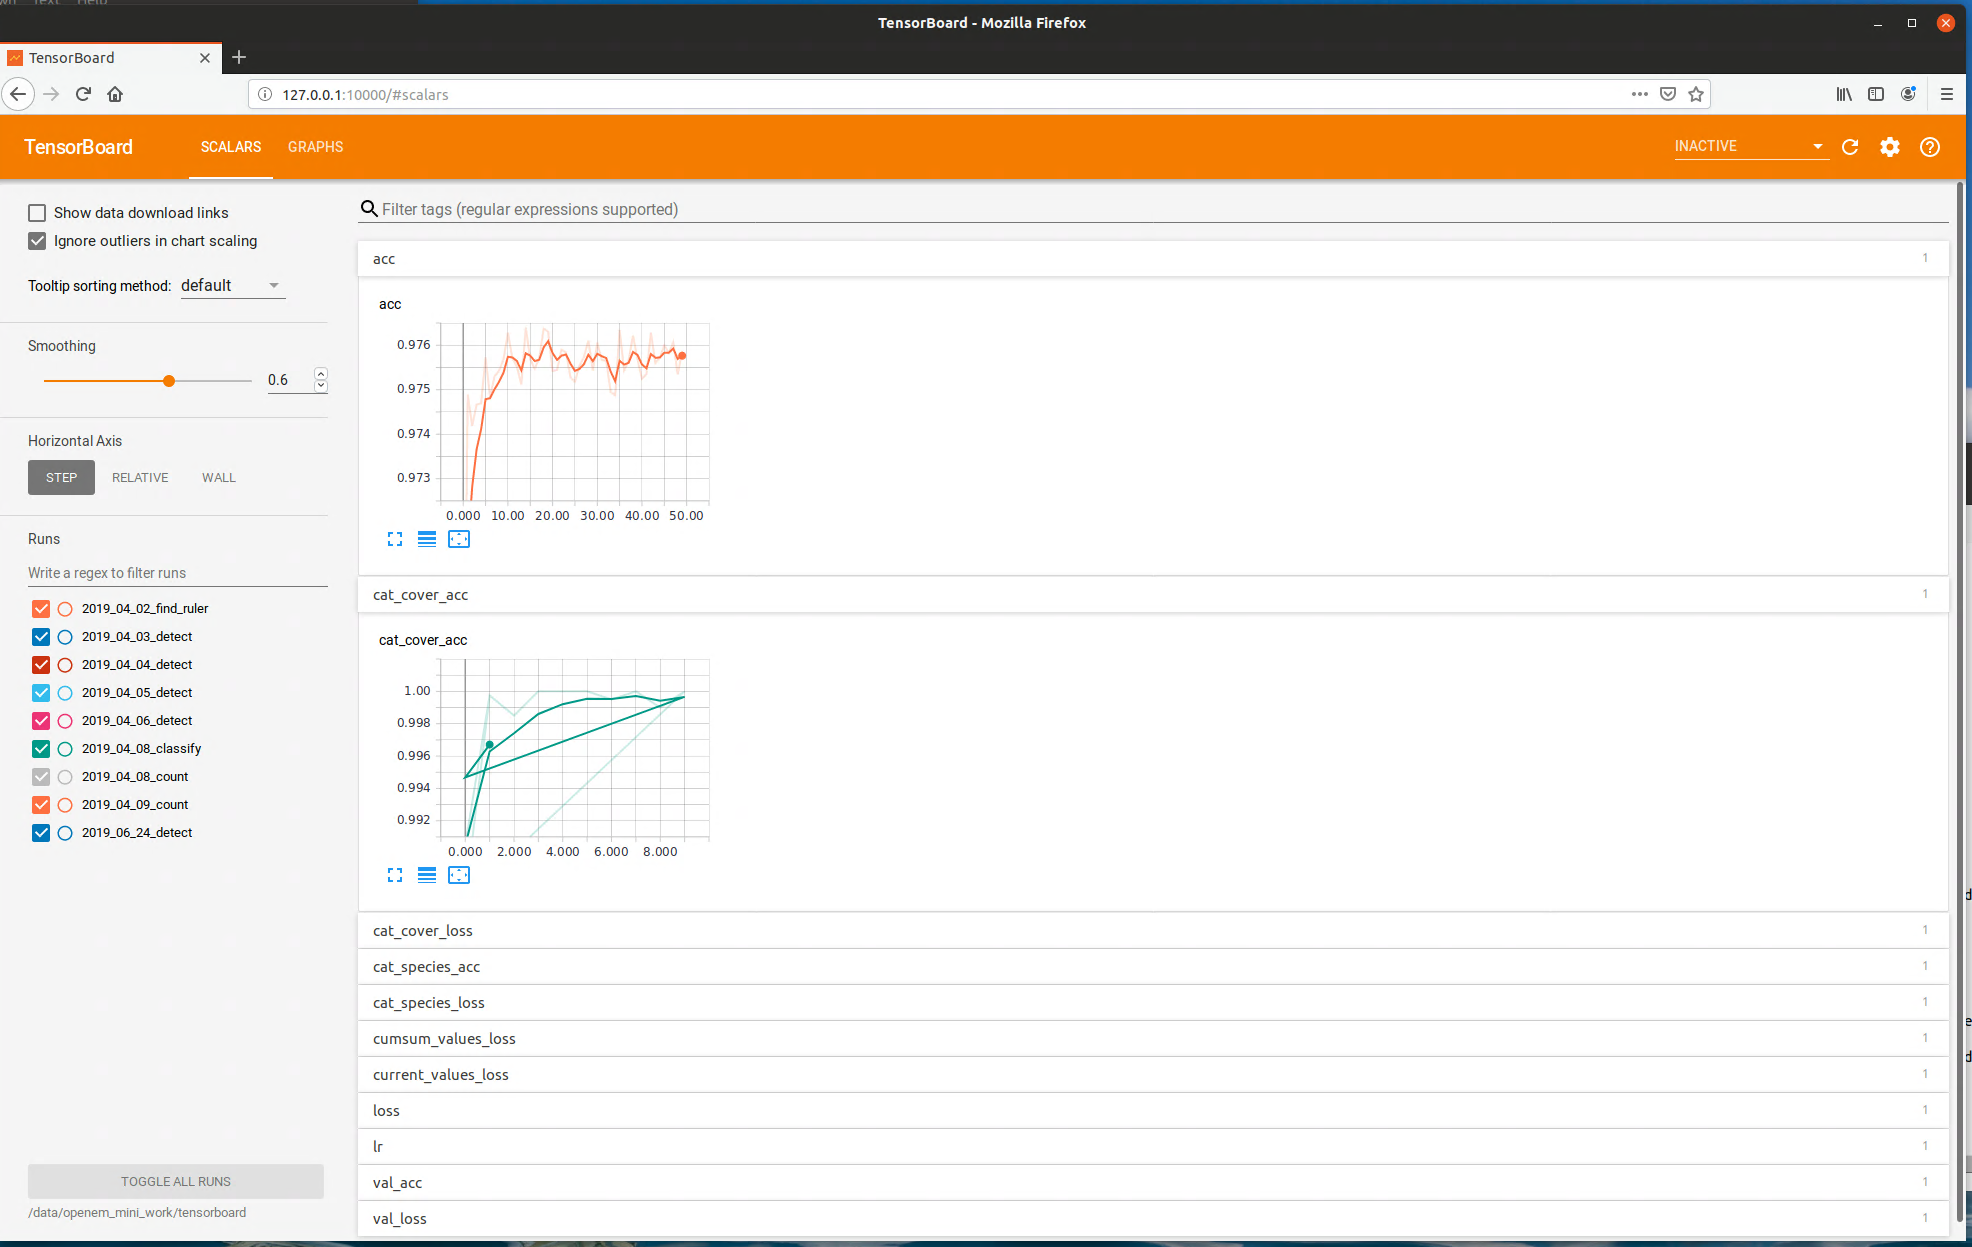 Tensorboard example
Then you can open a web browser on the same machine and go to 127.0.0.1:10000. This will display a live view of the training results. You can also use a different machine on the same network and modify the IP address accordingly. All training steps output tensorboard files, so you can monitor training of any of the openem models using this utility.
Once training completes, a new model will be converted to protobuf format and saved at:
<ModelDir>/deploy/find_ruler/find_ruler.pb
This file is the same format used in the example data for the deployment library.
Running Inference on train/val data
Now that we have a model for finding rulers, we can run the algorithm on all of our extracted images. Run the following command:
python train.py train.ini find_ruler_predict
This will use the model that we just trained to find the ruler endpoints. The outputs of this are stored at:
<WorkDir>/inference/find_ruler.csv
This file has a simple format, which is just a csv containing the video ID and (x, y) location in pixels of the ruler endpoints. Note that this makes the assumption that the ruler is not moving within a particular video. If it is, you will need to split up your videos into segments in which the ruler is stationary (only for training purposes).
It is possible to train only particular models in openem. Suppose we always know the position of the ruler in our videos and do not need the find ruler algorithm. In this case, we can manually create our own find ruler inference file that contains the same information and store it in the path above. So for example, if we know the ruler is always horizontal spanning the entire video frame, we would use the same (x, y) coordinates for every video in the csv.
Extract ROIs for Detection Training
The next step is extracting the regions of interest for the videos as determined in the previous step. Run the following:
python train.py train.ini extract_rois
This will dump the ROI image corresponding to each extracted image into:
<WorkDir>/train_rois